You know, one thing every data engineer, analyst, or cloud person runs into at some point is moving data. Because let’s be honest, no matter what your project is, data rarely lives in just one place. You’ve got some sitting in an on-premises database that’s been there since forever, a few files hiding out in Azure Blob Storage, and maybe even some bits scattered across other cloud platforms. Somehow, you have to get it from Point A to Point B, cleanly and reliably without losing your mind (or your data).
And that is why, in this article, I’ll be writing about Azure Data Factory, or ADF as most of us call it.
So, What Exactly Is Azure Data Factory?
Think of Azure Data Factory like your data delivery manager in the cloud.
ADF is the one making sure your data gets where it needs to go, safely, on time.
What it really does is help you connect, transform, and move data between different places. Maybe you’ve got some data sitting in an SQL Server on-premises, and you need it in Azure. Or maybe you’re moving files from Blob Storage into an Azure SQL Database. Either way, Data Factory handles all that behind the scenes.
You should know that ADF isn’t where your data lives. It doesn’t store anything. What it does is orchestrate, that is it makes sure the data moves smoothly, from one system to another without falling apart halfway.
A Simple Analogy:
Alright, imagine this.
You’re craving a burger from your favorite spot across town. You make an order, and now someone has to get that burger from the restaurant to your doorstep.
Here’s what’s involved:
- The restaurant’s address and access (so your order can be picked up)
- The actual burger, the thing you want moved
- Your home address (where it’s going)
- And of course, a delivery rider and someone managing the whole process to make sure it all goes smoothly
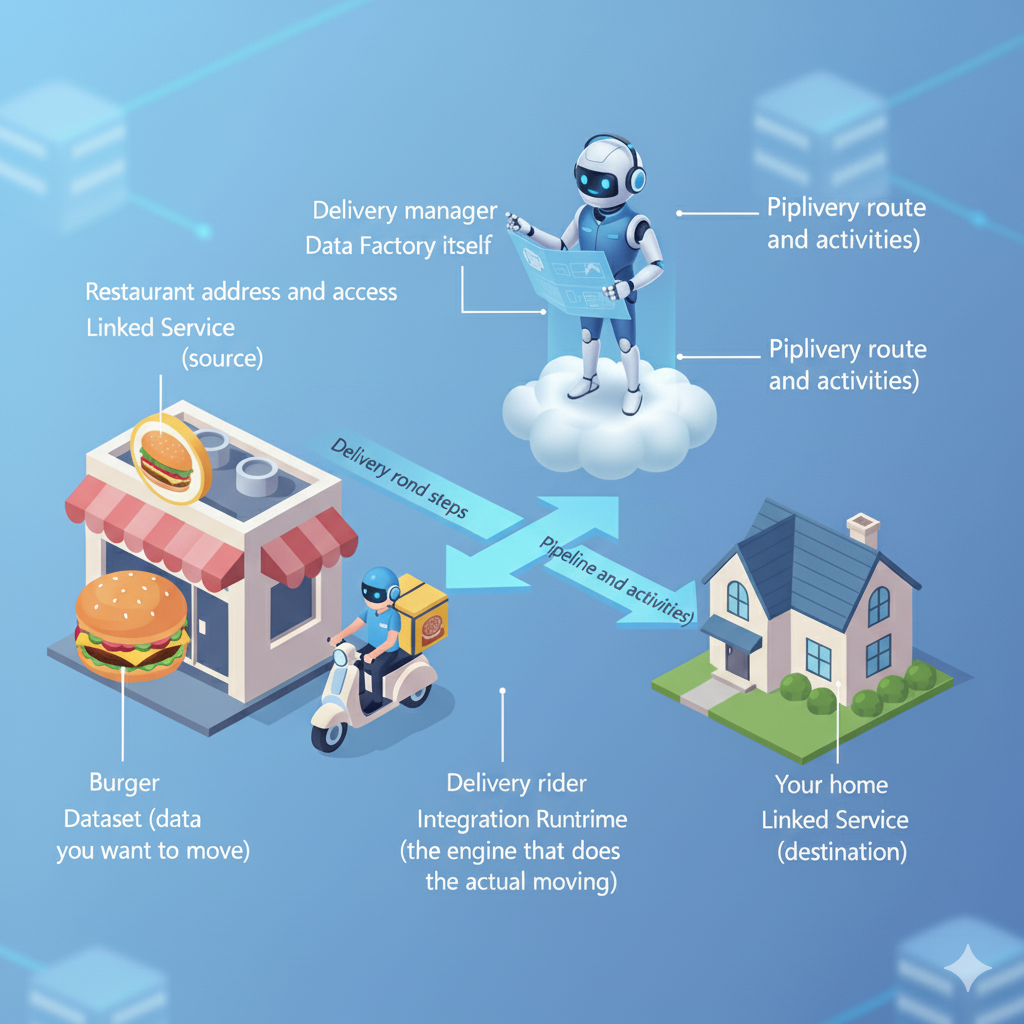
So in this illustration, ADF is the manager, it’s just making sure the burger moves from the restaurant to your home safely.
Moving Data from Blob to SQL
Let’s say, you’ve got a growing business, and every day hundreds of customer orders come in. To keep things simple, your application saves these orders as a CSV file in Azure Blob Storage.
Now, you want to analyze this data, maybe to find your best-selling products, track returning customers, or calculate weekly revenue. But for that, you’ll need it in a more structured environment, like Azure SQL Database.
ADF is going to be the invisible hand that picks up your “Customer Orders” data from Blob Storage and drops it neatly into SQL so it is ready for analysis, dashboards, and reports.
Let’s Get Practical
Now that you’ve got a sense of what Azure Data Factory does, it’s time to do some hands-on
Step 1: Setting Up the Resources
Before ADF can do its magic, you’ll need three things in Azure:
- Azure Data Factory — the orchestrator that controls the flow of data.
- Azure Blob Storage — where your source data (the CSV file) lives.
- Azure SQL Database — the destination where your data will end up.
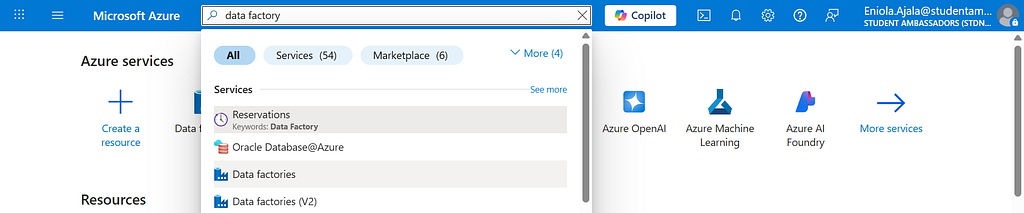
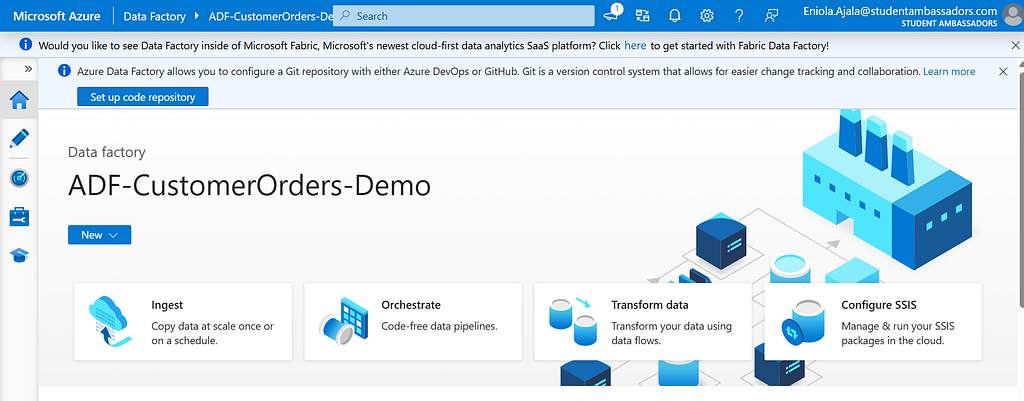
First, head to the Azure Portal and search for Data Factory.
Click Create, give it a name, maybe something like ADF-CustomerOrders-Demo, and place it in your resource group.
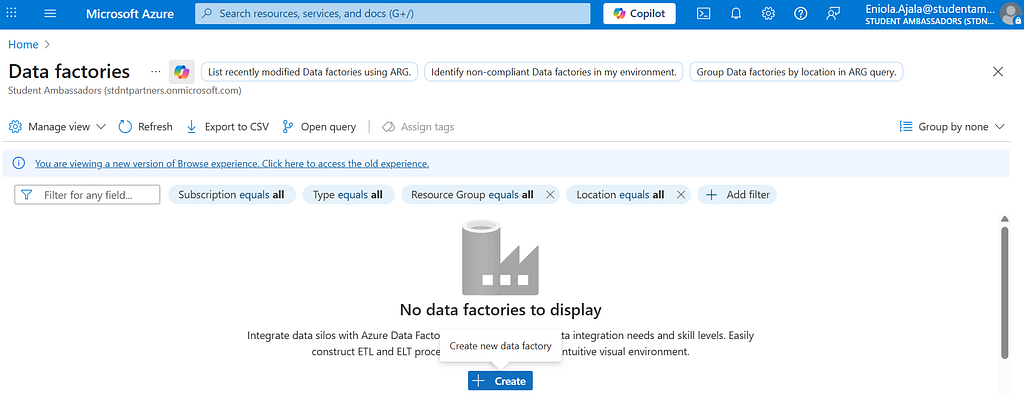
Choose a region close to you (for example, North Europe if you’re in the UK).
Then hit Create, it’ll take a minute or two to deploy.

While that’s loading, go ahead and create two more resources you’ll need:
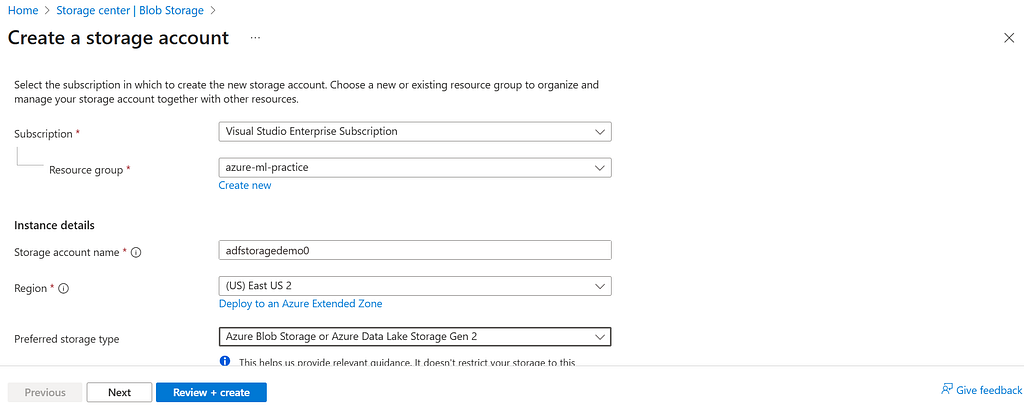
- Azure Blob Storage — where your customer_orders.csv file lives, I’ll be using the same resource group, give a name and you can leave the rest as default
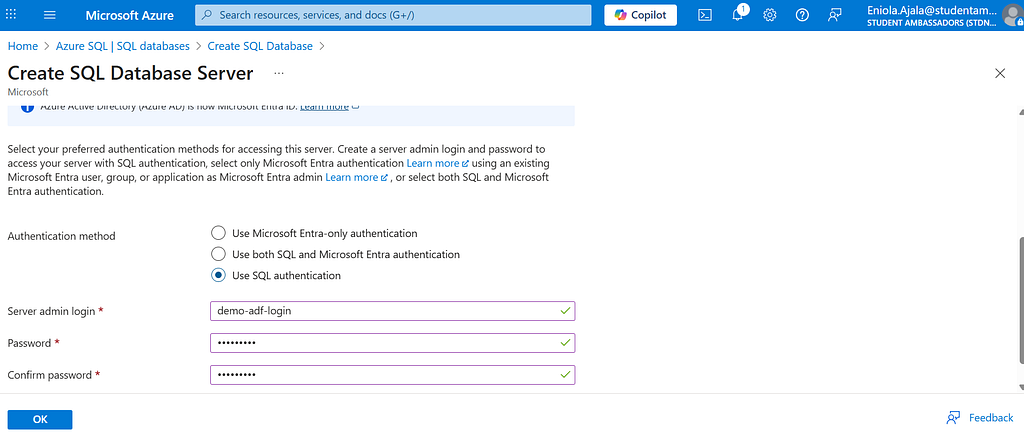
- Azure SQL Database — where the data will end up. Give your database a name, and if you don’t already have a server, go ahead and create one. Then, choose an authentication method that works for you.
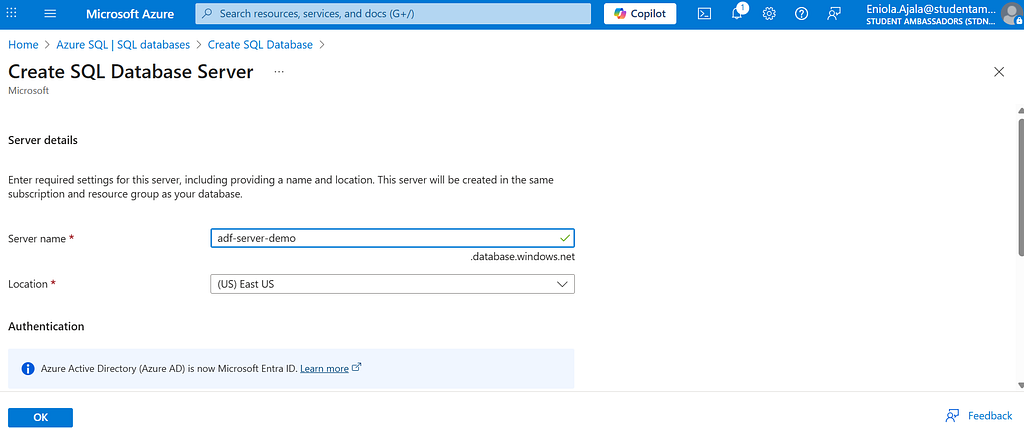
For the database, choose a simple setup — maybe Standard S1, and remember your username and password (you’ll need them later to connect).
Step 2: Upload Your Data to Blob Storage
After setting up your storage account, open it and navigate to the Containers tab from the menu on the left.
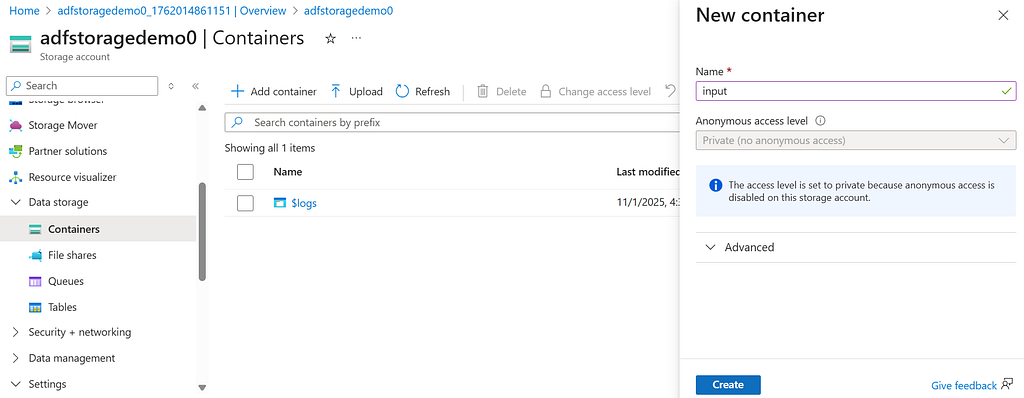
Create a new container and name it with whatever you like, for this tutorial, let’s call it input, then click Create.

Next, open the input container and upload your data file. I’ll be uploading the customer_orders.csv file. With that, your Blob Storage is ready.

Click on the file you just uploaded, then select Edit to view it.

Step 3: Prepare the Destination in SQL Database
Before we start moving data, we need somewhere to put it.
Go to your SQL Database in Azure Portal, in the left nav bar, click and open open the Query Editor,

login and run a quick SQL script to create a table:
CREATE TABLE CustomerOrders (
    OrderID INT,
    CustomerName NVARCHAR(100),
    Email NVARCHAR(100),
    Product NVARCHAR(100),
    Quantity INT,
    Price DECIMAL(10,2)
);
This will be the “home” where your data will land.
Now we’ve created our data, and we can actually go to Data Factory to start working.
Step 4: Connect Blob Storage to ADF
Now the fun part begins.
Go back to Azure Data Factory and launch studio,
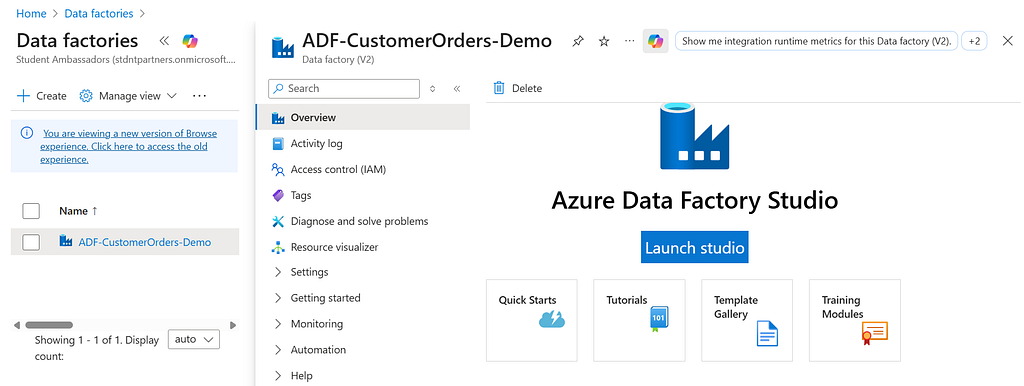
this will open the Author & Monitor interface. Here, there are a lot of good stuff.
Click the pencil icon on the left navigation bar, then take a moment to look around and explore.
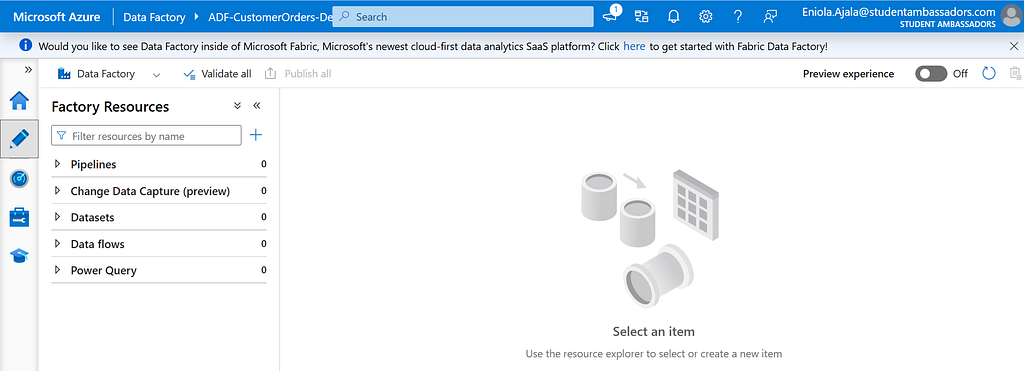
First, we’re going to create a pipeline, and then we’ll set up the integration runtime.
- In the left panel, go to Manage > Linked Services, then click + New to create your first connection.
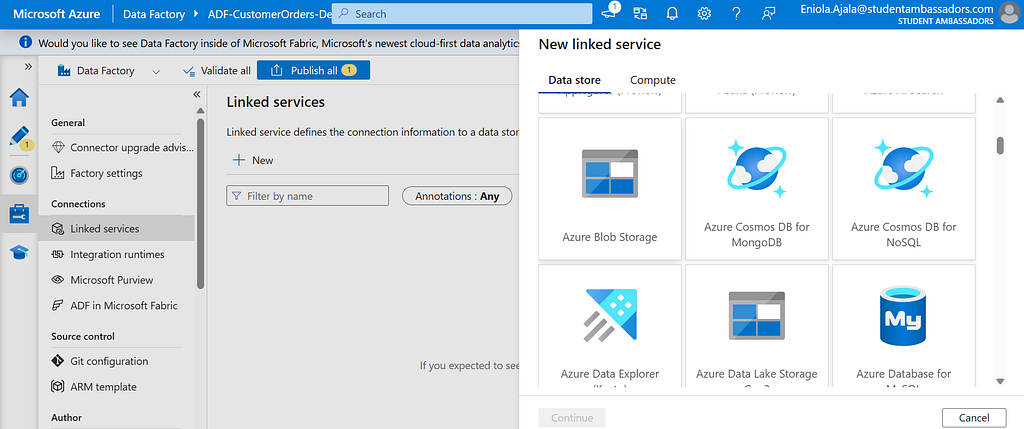
- Choose Azure Blob Storage from the list.
- Give it a name (e.g. InputBlob), and under Authentication method, choose Account Key for simplicity.
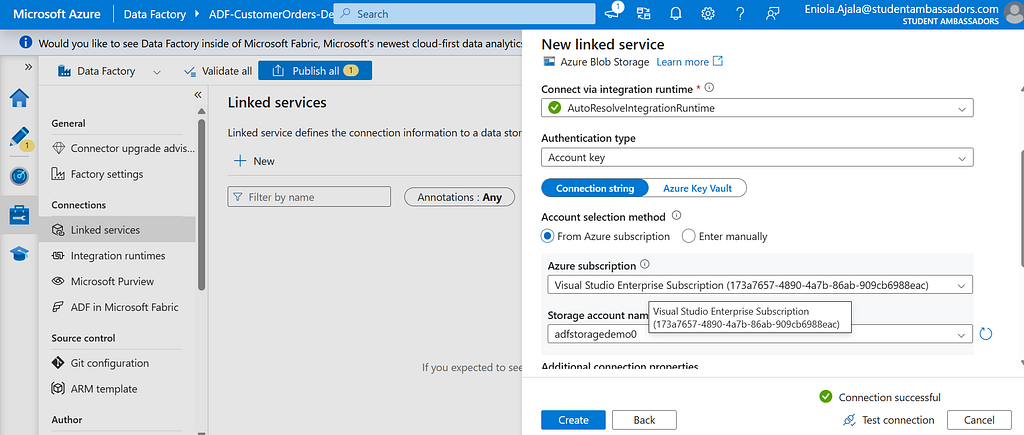
- Select your subscription and storage account, then click Test Connection , if it succeeds, hit Finish.
This is your Linked Service , in the burger story, this is like having the restaurant’s address and access.
Step 5: Create a Dataset for the Source Data
Next, you’ll define what you’re moving i.e. your “burger.”
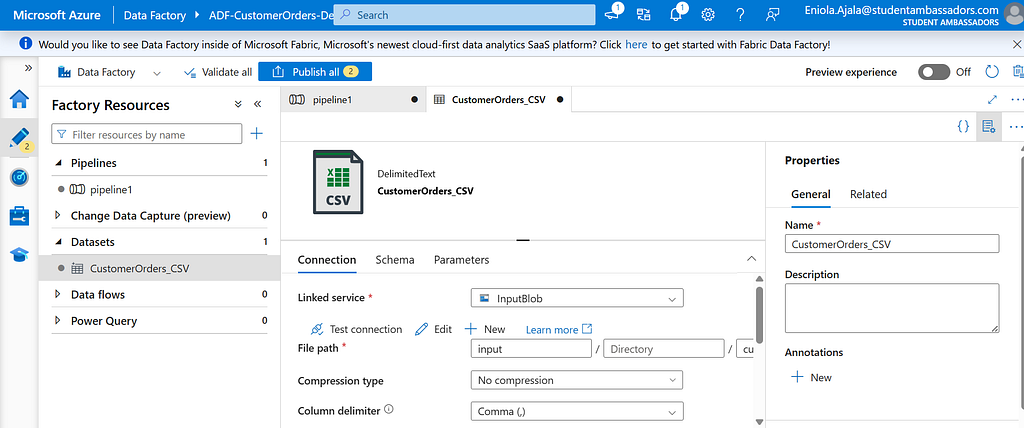
Go to Author > Datasets, click + New Dataset, and choose Azure Blob Storage > CSV.DelimitedText1

Name it CustomerOrders_CSV, and link it to the InputBlob service you just created.
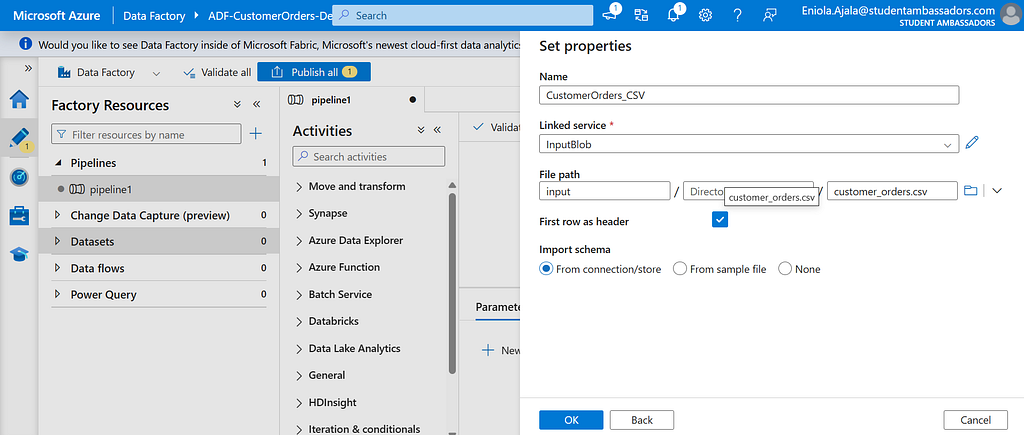
Browse to your input container and select the file customer_orders.csv.
Notice a new dataset was created
Check First row as header, then click OK.
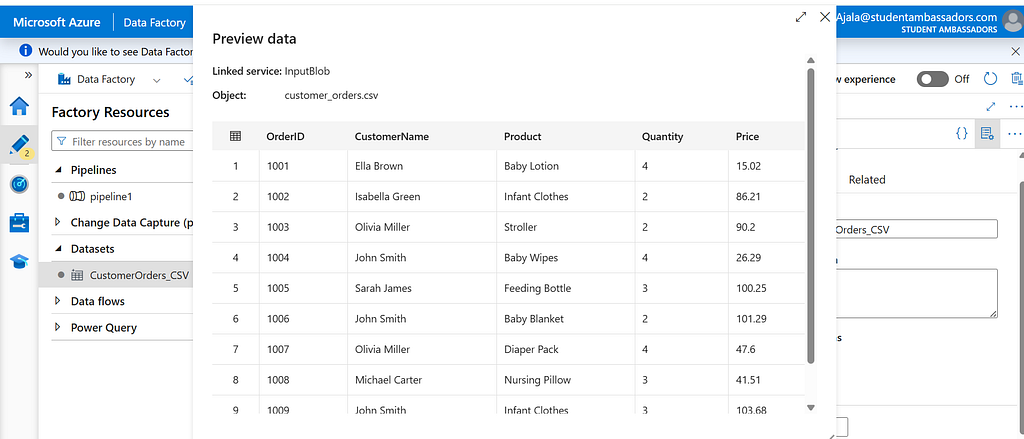
You can even preview the data to make sure it looks right, you should see columns like CustomerName, Product, Price, and so on.
Step 6: Create a Linked Service for SQL Database
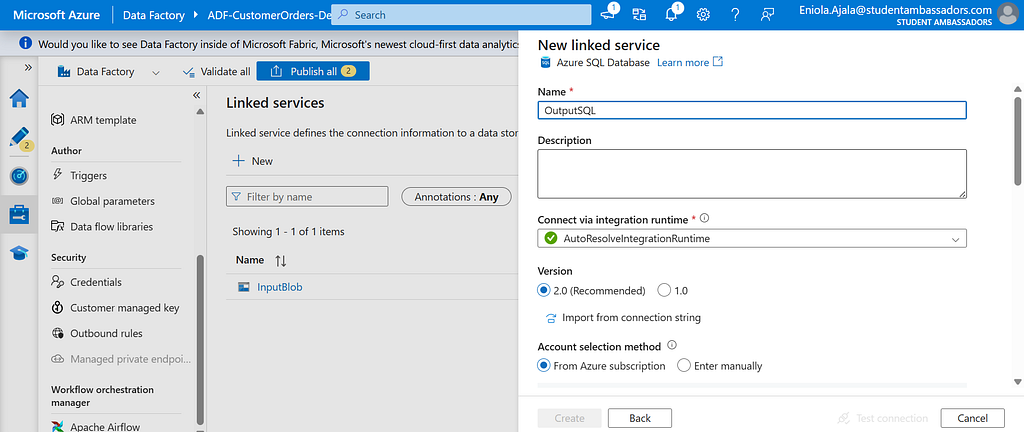
Just like we did for Blob Storage, go back to Linked Services and click + New again.
This time, pick Azure SQL Database.

Name it something like OutputSQL, and under Authentication Type, choose SQL Authentication.
Enter the server name, database name, username, and password that you created earlier.

Test the connection, if it’s successful, hit Finish.
This is your destination, the customer’s address where your “burger” (data) will be delivered.
Step 7: Create a Dataset for the Destination Table
Go to Datasets, create a new one, and choose Azure SQL Database.
Name it (e.g CustomerOrders_SQL).

Under Linked Service, pick OutputSQL.
Then select the table you created earlier, CustomerOrders.
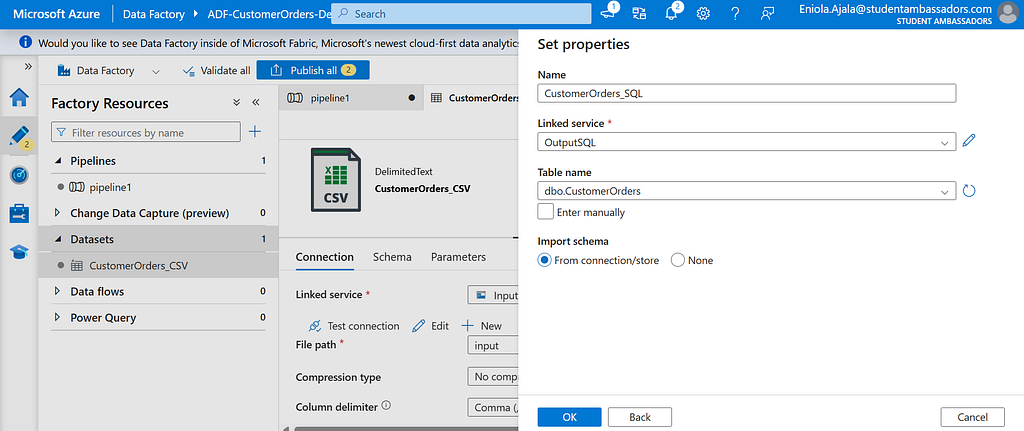
now we have two datasets

Now, both sides are connected, we’ve got our source (Blob) and destination (SQL)
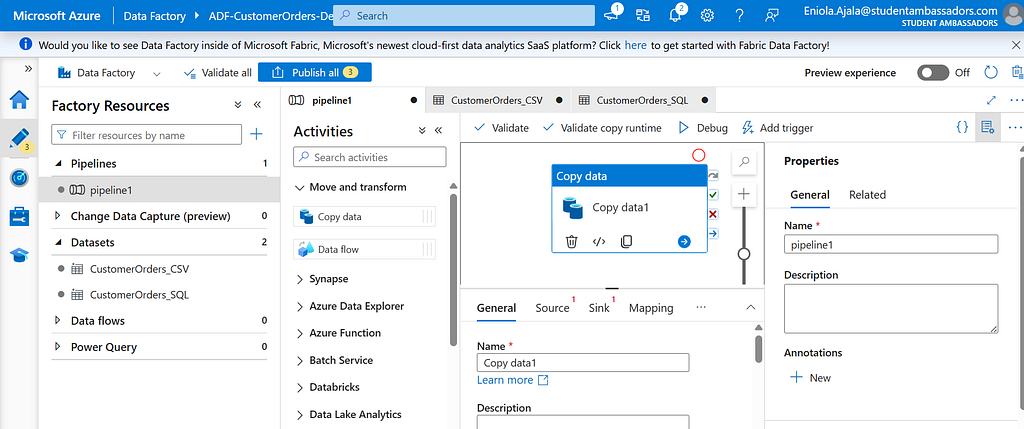
Step 8: Build the Pipeline
Head to Author > Pipelines and click + New Pipeline.
Give it a name CustomerOrders_ETL.
From the Activities panel, drag the Copy Data activity onto the canvas.
In the Source tab, select the dataset CustomerOrders_CSV.

In the Sink tab, choose CustomerOrders_SQL.
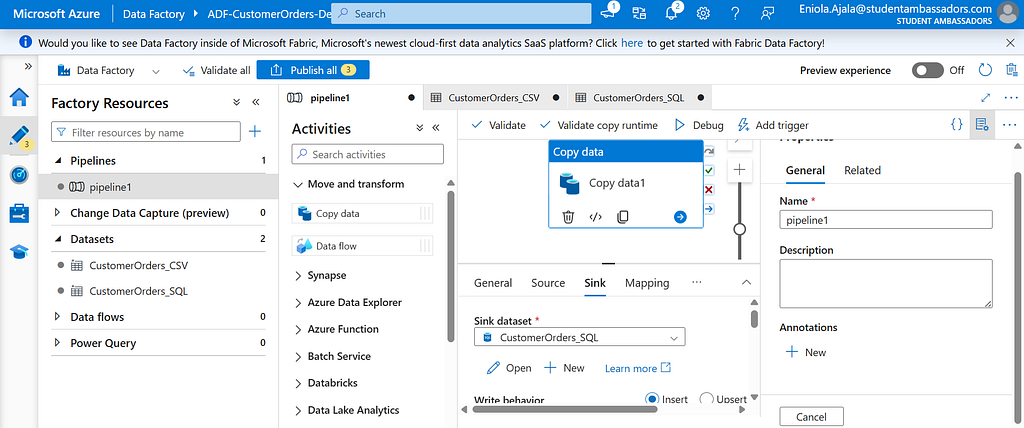
That’s it, you’ve told Data Factory what to move and where to move it.
It’s like assigning a rider (Integration Runtime) to pick up the burger (data) from the restaurant (Blob Storage) and deliver it to your home (SQL Database).

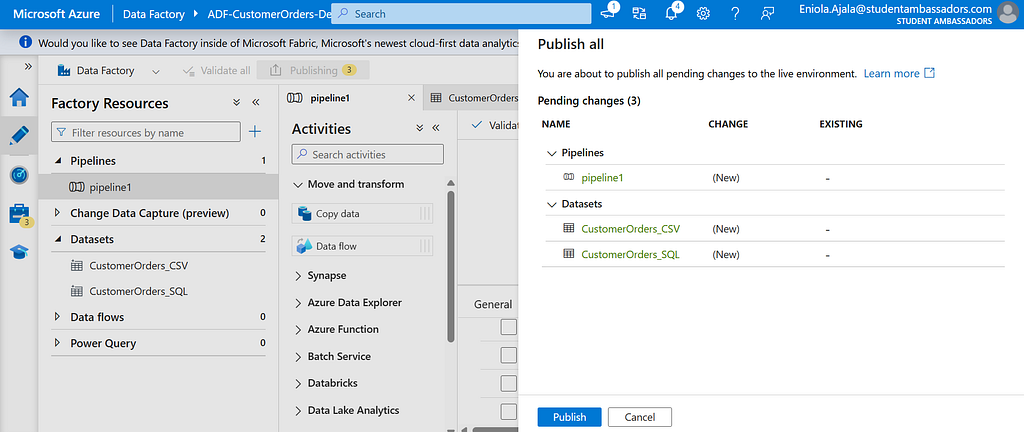
Step 9: Debug, Publish, and Run
Before publishing, click Debug to test your setup.
If everything is configured properly, ADF will start moving your data, you’ll see progress logs in real time.

Once it finishes successfully, you can Publish All and then Trigger Now to run the pipeline whenever you want.
You can check the Monitor tab to see the status — successful runs will be marked in green.
Step 10: Verify the Data in SQL
Head back to your SQL Database, open Query Editor, and run:
SELECT TOP 10 * FROM CustomerOrders;
You should see your customer order data now sitting neatly in your SQL table.
Voila you did it, you’ve just completed your first end-to-end data movement with Azure Data Factory.
Keeping the Delivery on Track
Once your pipeline is ready, you don’t want to manually run it every time new customer order data arrives. Instead, you want it automated.
In Azure Data Factory, you can create a trigger. You can set it to run daily, weekly, or even every few hours depending on how often new data lands in your Blob Storage.

Now that your deliveries (data movements) are happening automatically, you’ll want to make sure everything’s running smoothly, by making use of monitoring functionality.
From the Monitor tab in ADF, you can see a list of all your pipeline runs, their statuses, and the time they took. A green check means your burger (data) was delivered successfully. A red cross means something went wrong, maybe the restaurant was closed (source not available) or the delivery route failed (a step in your pipeline broke).
Before You Go
This is just the start. There’s actually a lot more you can do with ADF.
You can learn more about Azure by visiting Microsoft Learn.
Cheers :)
Azure Data Factory: Moving Data from Blob to SQL was originally published in Towards AI on Medium, where people are continuing the conversation by highlighting and responding to this story.